Khác biệt giữa các bản “Cảm Biến Màu Sắc TCS34725”
| Dòng 50: | Dòng 50: | ||
Kết nối cơ bản giữa module MAX30100 và Arduino như hình bên dưới. Chú ý là cần mắc 2 điện trở 4.7KΩ kéo lên cho hai đường SCL và SDA của I2C. | Kết nối cơ bản giữa module MAX30100 và Arduino như hình bên dưới. Chú ý là cần mắc 2 điện trở 4.7KΩ kéo lên cho hai đường SCL và SDA của I2C. | ||
| − | [[Hình: | + | [[Hình:module-cam-bien-mau-sac-tcs34725-connect-arduino.png|x300px]] |
=== Tải thư viện === | === Tải thư viện === | ||
| − | Dùng thư viện [http://download.chipfc.com/download.php?id= | + | Dùng thư viện [http://download.chipfc.com/download.php?id=20&token=PdkJoV2a9ZHmJePAM97AQbMiuthMs7W8 Adafruit_TCS34725 Arduino library] được phát triển bởi [https://github.com/adafruit/Adafruit_TCS34725 Adafruit] |
Nếu bạn chưa biết cách sử dụng một thư viện Arduino có thể xem hướng dẫn tại [[Thư viện Arduino]] | Nếu bạn chưa biết cách sử dụng một thư viện Arduino có thể xem hướng dẫn tại [[Thư viện Arduino]] | ||
| Dòng 60: | Dòng 60: | ||
=== Sử dụng ví dụ mẫu === | === Sử dụng ví dụ mẫu === | ||
| − | Sau khi cài đặt thành công thư viện | + | Sau khi cài đặt thành công thư viện Adafruit_TCS34725, Arduino IDE sẽ xuất hiện mục '''Adafruit_TCS34725'''. |
Với các Example được viết sẵn là: | Với các Example được viết sẵn là: | ||
| Dòng 68: | Dòng 68: | ||
* '''MAX30100_Tester''': sketch này giúp bạn tìm nguyên nhân gây ra lỗi cảm biến trong trường hợp cảm biến gặp vấn đề. | * '''MAX30100_Tester''': sketch này giúp bạn tìm nguyên nhân gây ra lỗi cảm biến trong trường hợp cảm biến gặp vấn đề. | ||
| − | [[Hình:module-cam-bien- | + | [[Hình:module-cam-bien-mau-sac-tcs34725-library-1.png|600px]] |
| − | ==== Thử với | + | ==== Thử với ==== |
Nội dung code mẫu | Nội dung code mẫu | ||
<syntaxhighlight lang="cpp" style="border-radius: 6px 6px 6px 6px;border: 1px dotted"> | <syntaxhighlight lang="cpp" style="border-radius: 6px 6px 6px 6px;border: 1px dotted"> | ||
| − | + | // | |
| − | |||
| − | |||
| − | |||
| − | |||
| − | // | ||
| − | |||
| − | |||
| − | |||
| − | |||
| − | |||
| − | |||
| − | |||
| − | |||
| − | |||
| − | |||
| − | |||
| − | |||
| − | |||
| − | |||
| − | |||
| − | |||
| − | |||
| − | |||
| − | |||
| − | |||
| − | |||
| − | |||
| − | |||
| − | |||
| − | |||
| − | |||
| − | |||
| − | |||
| − | |||
| − | |||
| − | |||
| − | |||
| − | |||
| − | |||
| − | |||
| − | |||
| − | |||
| − | |||
| − | |||
| − | |||
| − | |||
| − | |||
| − | |||
| − | |||
| − | |||
| − | |||
| − | |||
| − | |||
| − | |||
| − | |||
| − | |||
| − | |||
| − | |||
| − | |||
| − | |||
| − | |||
| − | |||
| − | |||
</syntaxhighlight> | </syntaxhighlight> | ||
| − | Sau khi Upload thành công lên Arduino, hãy thử mở '''Serial Monitor''' (menu Tools) để xem kết quả. | + | Sau khi Upload thành công lên Arduino, hãy thử mở '''Serial Monitor''' (trong menu Tools) để xem kết quả. |
* Serial Monitor | * Serial Monitor | ||
| − | [[Hình:module-cam-bien- | + | [[Hình:module-cam-bien-mau-sac-tcs34725-library-7.png|x400px]] |
| − | |||
| − | |||
| − | |||
| − | |||
| − | |||
| − | |||
| − | |||
| − | |||
| − | |||
| − | |||
| − | |||
| − | |||
| − | |||
| − | |||
| − | |||
| − | |||
| − | |||
| − | |||
| − | |||
| − | |||
| − | |||
| − | |||
| − | |||
| − | |||
| − | |||
| − | |||
| − | |||
| − | |||
| − | |||
| − | |||
| − | |||
| − | |||
| − | |||
| − | |||
| − | |||
| − | |||
| − | |||
| − | |||
| − | |||
| − | |||
| − | |||
| − | |||
| − | |||
| − | |||
| − | |||
| − | |||
| − | |||
| − | |||
| − | |||
| − | |||
| − | |||
| − | |||
| − | |||
| − | |||
| − | |||
| − | |||
| − | |||
| − | |||
| − | |||
| − | |||
| − | |||
| − | |||
| − | |||
| − | |||
| − | |||
| − | |||
| − | |||
| − | |||
| − | |||
| − | |||
| − | |||
| − | |||
| − | |||
=== Chú ý === | === Chú ý === | ||
| − | |||
| − | |||
| − | |||
== Tham khảo == | == Tham khảo == | ||
| − | * [https://github.com/ | + | * [https://learn.adafruit.com/adafruit-color-sensors?view=all Adafruit Color Sensors] |
| + | * [https://github.com/adafruit/Adafruit_TCS34725 Arduino Library] | ||
| + | * [http://download.chipfc.com/download.php?id=19&token=xBSVW1moRTAscPYIpFyKkgf2f5SZ1kYo TCS34725 Data Sheet] | ||
Phiên bản lúc 00:44, ngày 31 tháng 10 năm 2017
Mục lục
Giới thiệu
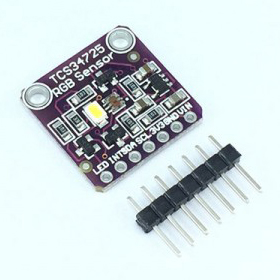
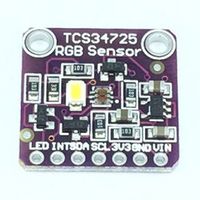
Module Cảm Biến Màu Sắc TCS34725 trên trang chủ
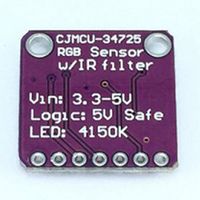
Thiết bị điện tử của bạn bây giờ có thể nhìn thấy màu sắc rực rỡ với module cảm biến nhỏ xíu đáng yêu này. Bạn sẽ thấy TCS34725 chính là cảm biến màu sắc tốt nhất trên thị trường, nó có thể nhận biết từng màu thành phần màu RGB và cường độ sáng trắng.
Thông số kỹ thuật
- IC: TCS34725
- Điện áp hoạt động: 1.8 - 5.5 VDC (khuyên dùng 5V)
- Giao tiếp I2C, mức TTL
- I2C address 0x29 (7-bit)
- Khối lượng: 3.23g
- Kích thước: 20.44mm / 0.8" x 20.28mm / 0.79"
Mô tả các chân kết nối
| Thứ tự chân | Ký hiệu | Loại | Mô tả |
|---|---|---|---|
| 1 | VIN | Power | Nguồn cấp 1.8V - 5.5V (khuyên dùng 5V) |
| 2 | SCL | Input | I2C SCL |
| 3 | SDA | I/O | I2C SDA |
| 4 | INT | Output | Chân INT của MAX30100 |
| 5 | IRD | Chân IR_DRV của MAX30100 | |
| 6 | RD | Chân R_DRV của MAX30100 | |
| 7 | GND | Power | Điện áp đất 0V |
Sử dụng với Arduino
Kết nối module với Arduino
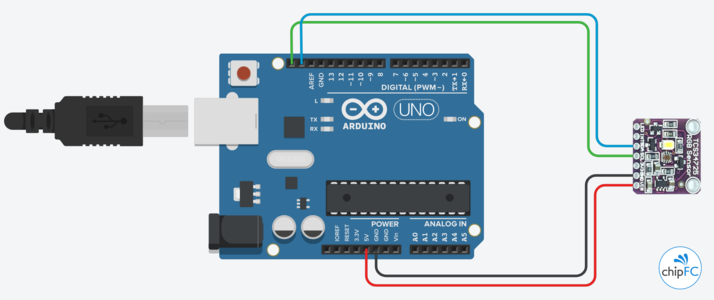
Kết nối cơ bản giữa module MAX30100 và Arduino như hình bên dưới. Chú ý là cần mắc 2 điện trở 4.7KΩ kéo lên cho hai đường SCL và SDA của I2C.
Tải thư viện
Dùng thư viện Adafruit_TCS34725 Arduino library được phát triển bởi Adafruit
Nếu bạn chưa biết cách sử dụng một thư viện Arduino có thể xem hướng dẫn tại Thư viện Arduino
Sử dụng ví dụ mẫu
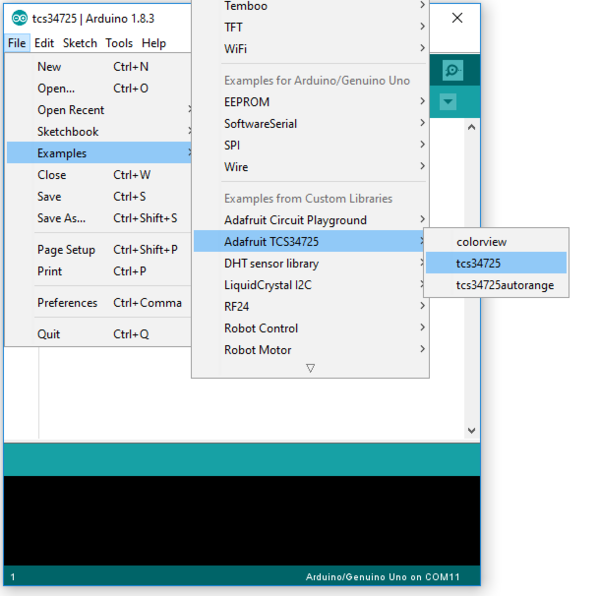
Sau khi cài đặt thành công thư viện Adafruit_TCS34725, Arduino IDE sẽ xuất hiện mục Adafruit_TCS34725.
Với các Example được viết sẵn là:
- MAX30100_Debug: được dùng kết hợp với Processing pde "rolling_graph" (thư mục extras), để hiển thị dữ liệu với nhiều giai đoạn xử lý khác nhau.
- MAX30100_Minimal: một ví dụ đơn giản hiển thị kết quả dễ đọc qua Serial Monitor.
- MAX30100_DrawData: ví dụ lấy dữ liệu gốc từ cảm biến, chưa qua xử lý, có thể quan sát kết quả qua Serial Plotter hoặc Serial Monitor.
- MAX30100_Tester: sketch này giúp bạn tìm nguyên nhân gây ra lỗi cảm biến trong trường hợp cảm biến gặp vấn đề.
Thử với
Nội dung code mẫu
//Sau khi Upload thành công lên Arduino, hãy thử mở Serial Monitor (trong menu Tools) để xem kết quả.
- Serial Monitor
